Software Defined Networking – Network Automation
We don’t usually post blogs including specific technical data, as these articles are usually found on our Knowledge Base, where we store all our technical articles on a range of subjects and all our vendors.
This information has never been published before and cannot be found anywhere else, including Ruckus’ own Knowledge Base. This information is extremely valuable and would usually only be available to our partners through our Purdicom partner portal.
However, we have decided to share with you this exclusive article on how to implement Software Defined Networking for free, providing you with key insight into how you can manage your entire network with ease from one central point. This knowledge would usually be chargeable; however, we regularly post articles similar to this on our Knowledge Base. To benefit from more articles like this, you’ll need to be a trading customer and register as a partner here.
Software Defined Networking – Network Automation

Managing a switching network can be tedious and troublesome, especially when there can be many unknowns such as end-user devices being plugged in at random with no certainty if they’re running the latest patch, supported operating system or if the end device is compromised.
The aim of this article is to put you back in control and manage the entire network in a secure manner from a central point; without ever having to worry about rogue devices connecting to your network again. Ensuring you’ll almost never need to configure another switch port again.
Pre-Requisites:
- This has been tested on a switch running firmware version 08.0.80
- Requires an understanding of Windows Active Directory Services – Windows Security Groups, Windows Group Policy Objects
- Must be running Windows Active Directory 2008 or later
- Requires all MAC Address of non-domain joined devices to be collected prior to following the below steps
- Requires an additional three Windows Servers
- 1x 2012R2 Standard or Higher for running Active Directory Certificate Services Role – Must be fully patched and added to the Windows Domain
- 2x 2012R2 or Higher for Network Policy Server Role to be installed – Must be fully patched and added to the Windows Domain
- If there is already a Certificate Server in the domain then there is no need to install another
Windows Active Directory Certificate Services Configuration
In order for the Network Automation to function the RADIUS servers require a certificate, this also allows Windows Domain joined Devices to connect to the network using certificates which is far more secure than MAC Authentication.
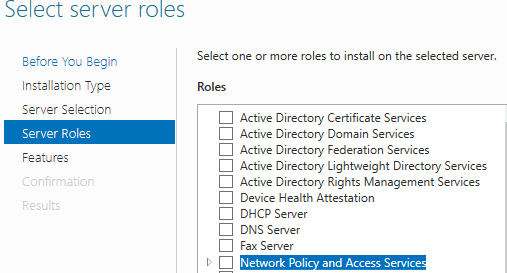
Step 1 – Install the role
Only select “Active Directory Certificate Services” and follow the wizard until the next screenshot.

Ensure that only “Certification Authority” is selected

Then follow the wizard until the installation is complete.
Step 2 – Configure “Active Directory Certificate Services”
Check the credentials are correct and ensure the user configuring the policy is part of the “Domain Admins” Windows Security Group.

Ensure the “Certificate Authority” option is checked to begin configuring the role.
Follow the wizard leaving the options at default settings until the screenshot below.
The Root Certificate Authority for the domain has a certificate that is only valid for 5 years, you can change this and increase it should you wish so that you do not need to renew the certificate every five years.

There are no more steps for this role so follow the wizard to the end.
Active Directory Configuration
Step 1 – Configuring Active Directory Users
As this entire solution relies upon using Active Directory Security Groups you must define the groups.
In this scenario, there are only two Security Groups; “802.1x-Devices” and “MAC-Auth Users”. In real deployments, you should ideally have a Security Group per device type such as printers, phones, BMS, access control, etc. so that you have greater control with segmentation later on if you require it.

Step 2 – Configuring User Accounts
For non-domain devices, we must create a user account. The account consists of the username being the MAC address of the device in lower case and the password being set to a fixed string.
Please note in this scenario we will use the password RuckusRocks! for all user accounts, the password must be the same on all accounts created so that you don’t need to lower Active Directory Password Complexity. Furthermore, the switch will use this later in the configuration.


The final part is to make the user a “Member Of” the Security Group we created previously.

Windows Network Policy Server Configuration
The RADIUS server is the black magic where all the intelligence is configured. It’s this piece of the puzzle which enforces control and defines what VLAN / network resources can be accessed dynamically without you the administrator needing to configure each switch port when a new device is plugged in.
Step 1 – Install the role
On the servers which are to be configured as RADIUS only select “Network Policy and Access Service Tools” and follow the wizard until the role is installed.
Step 2 – Request a Certificate
In order to dynamically authenticate Windows Domain Joined Devices, we must request a certificate which the RADIUS server will provide to clients when they try to authenticate if using machine-based authentication.
Without the certificate, any device attempting machine-based authenticate will fail to join the network, it is also vitally important to note that the certificate needs to be renewed once a year. Failure to do so will result in devices being unable to connect to the network, so it is worthwhile setting a calendar reminder.
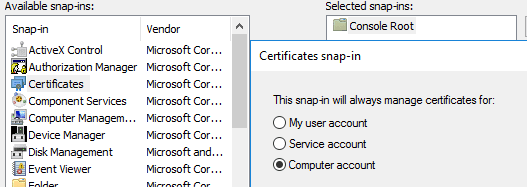
Open the MMC Console and add “Certificates” which will present a pop up where you need to select “Computer Account”.
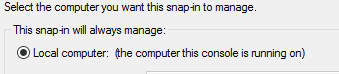
Next select “Local Computer” and click ok.
This will display a screen like below, simply right click on “Personal” and then select “Request New Certificate”

Select “Active Directory Enrollment Policy” and click next which will allow you to select “Computer” where you then need to click “Enrol”

This will now generate a certificate for the RADIUS server, if you have more than one server then repeat this step on that server too.

Step 3 – Creating The RADIUS Policies
The next few steps are all actioned on the RADIUS servers, from “Server Manager” select “Tools” and launch “Network Policy Server”
Step 3.1 – Define RADIUS Client
In order for the Authenticator(s) (Switches) to communicate with the RADIUS server, we must tell the RADIUS server to expect a request from them.
You must provide a name and IP Address (x.x.x.x) or if you are using Windows Server 2012R2 OR 2016 Datacenter you can enter the entire subnet (x.x.x.x/xx). Each switch IP address must be entered if you are not authenticating the entire subnet.

Please ensure you make a note of the “Shared Secret” as this is used in the switch configuration later on.
Step 3.2 – Define Connection Request Policy
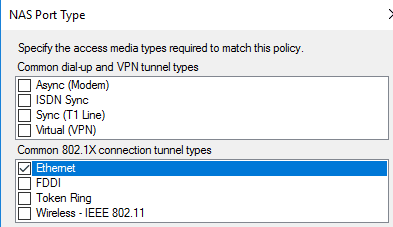
For additional security, we must define the type of Connection Request the RADIUS server should accept. In this case, we must specify the “NAS Port Type” as Ethernet under conditions.


Once we have defined the “NAS Port Type” we need to disable the default policy “Use Windows authentication for all users” so we just don’t accept any request.
Step 3.3 – Defining MAC Authentication Network Policy
For devices which are not domain-joined or don’t support 802.1x, we need to define a policy to enable them to connect to the network using their MAC Address.
Name The Policy and click next

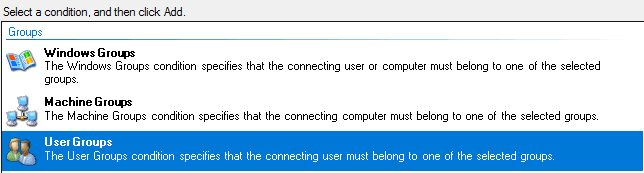
Specify the Windows Security Group you created earlier for MAC Authentication and select “User Groups” When a user matches the rule they will be placed into the relevant VLAN defined later on in this guide.
Specify the “NAS Port Type” to be Ethernet and follow the wizard until you get to the next screenshot.


In the “Constraints” tab ensure only “Unencrypted authentication (PAP, SPAP)” are selected

The “Tunnel-Pvt-Group-ID” will need to be changed per VLAN. This is the exact name of the VLAN the client will be placed according to the VLAN defined on the switch.

Finally, we need to go into the properties of the newly created policy and tick the option “Ignore user account dial-in-properties”

Step 3.4 – Defining 802.1x Authentication Network Policy
For devices that are domain-joined, we can ensure they only connect using machine-based authentication. This means that we don’t need to enter in their MAC address in Active Directory and also means that they require a certificate adding an extra layer of security.
Name the Policy and click next

Specify the Windows Security Group you created earlier for 802.1x Authentication and select “Machine Groups”
When a user matches the rule they will be placed into the relevant VLAN defined later on in this guide.


Specify the “NAS Port Type” to be Ethernet and follow the wizard until the next screenshot.

In the “Constraints” tab click “Add” and select “Microsoft: Protected EAP (PEAP)

The “Tunnel-Pvt-Group-ID” will need to be changed per VLAN. This is the exact name of the VLAN the client will be placed according to the VLAN defined on the switch.

Finally, we need to go into the properties of the newly created policy and tick the option “Ignore user account dial-in-properties”

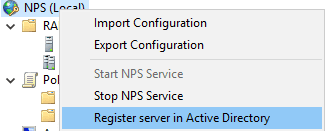
Step 3.5 – Registering the Server in Active Directory
Whilst the RADIUS server is Domain joined in order to read the information in the “Dial-In Properties” we must register Network Policy Server.
Right-click on NPS (Local) and click “Register server in Active Directory
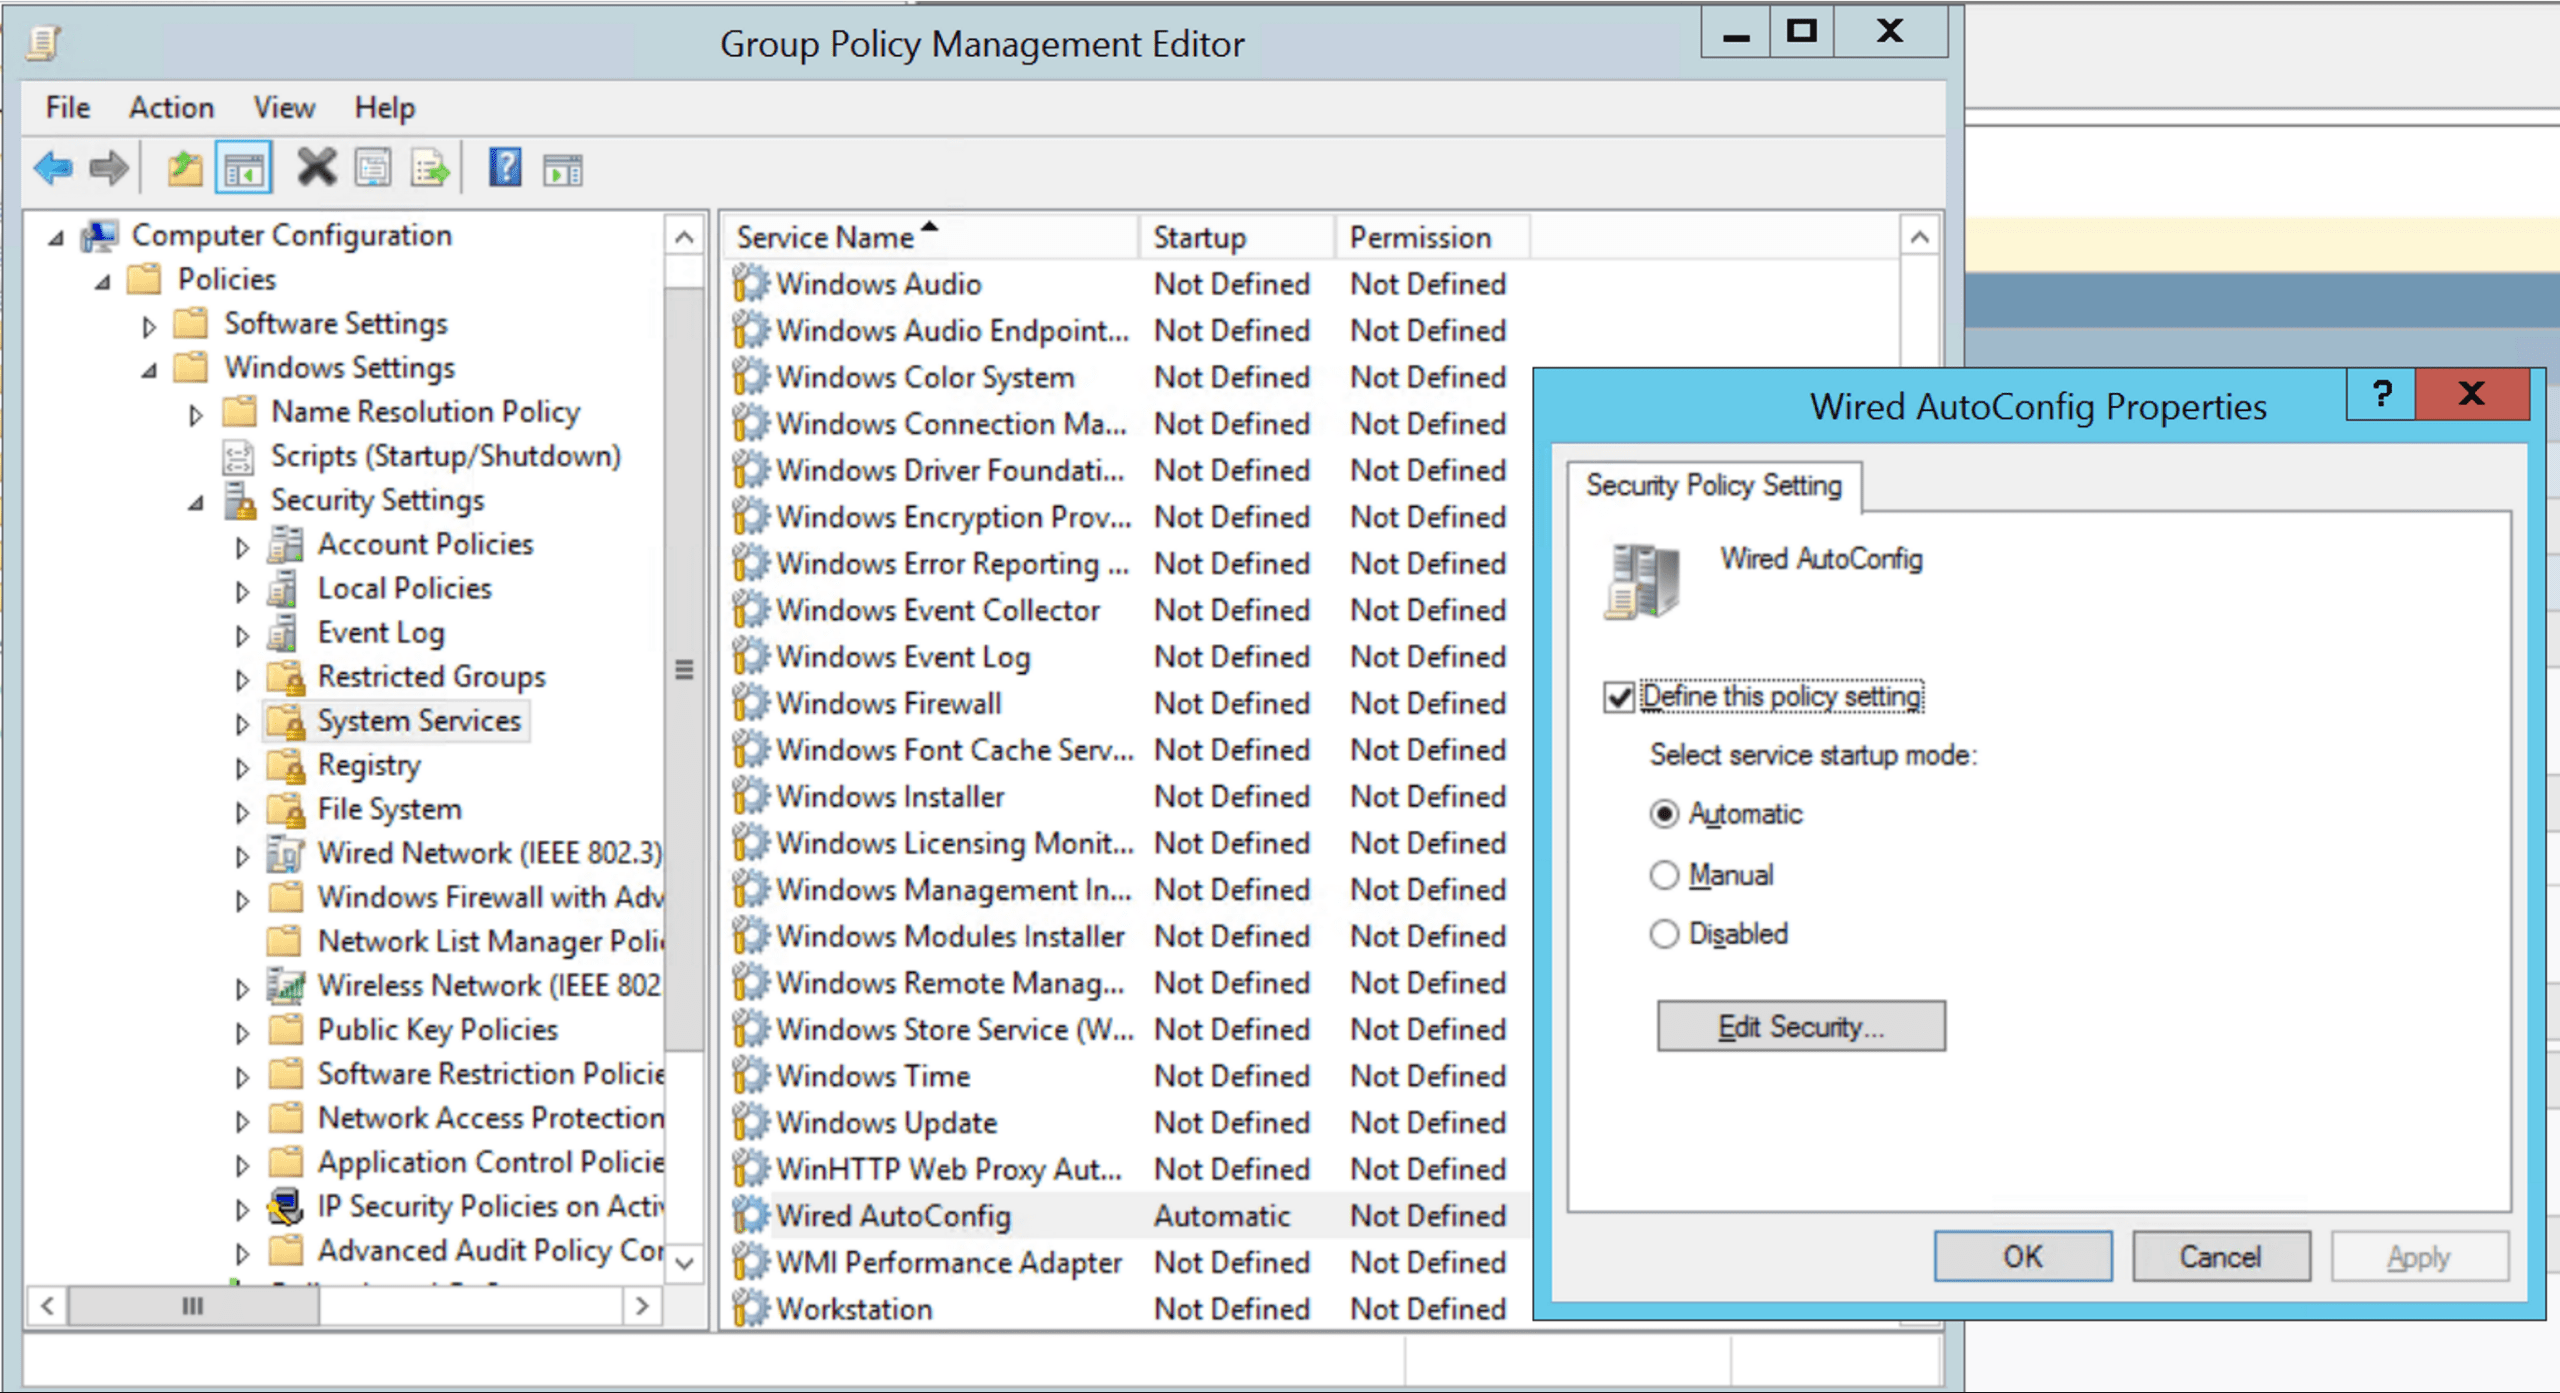
Windows Group Policy Configuration
In order for Domain-Joined devices to use certificate Machine Based Authentication, we must first enable the “Wired AutoConfig” service like below.
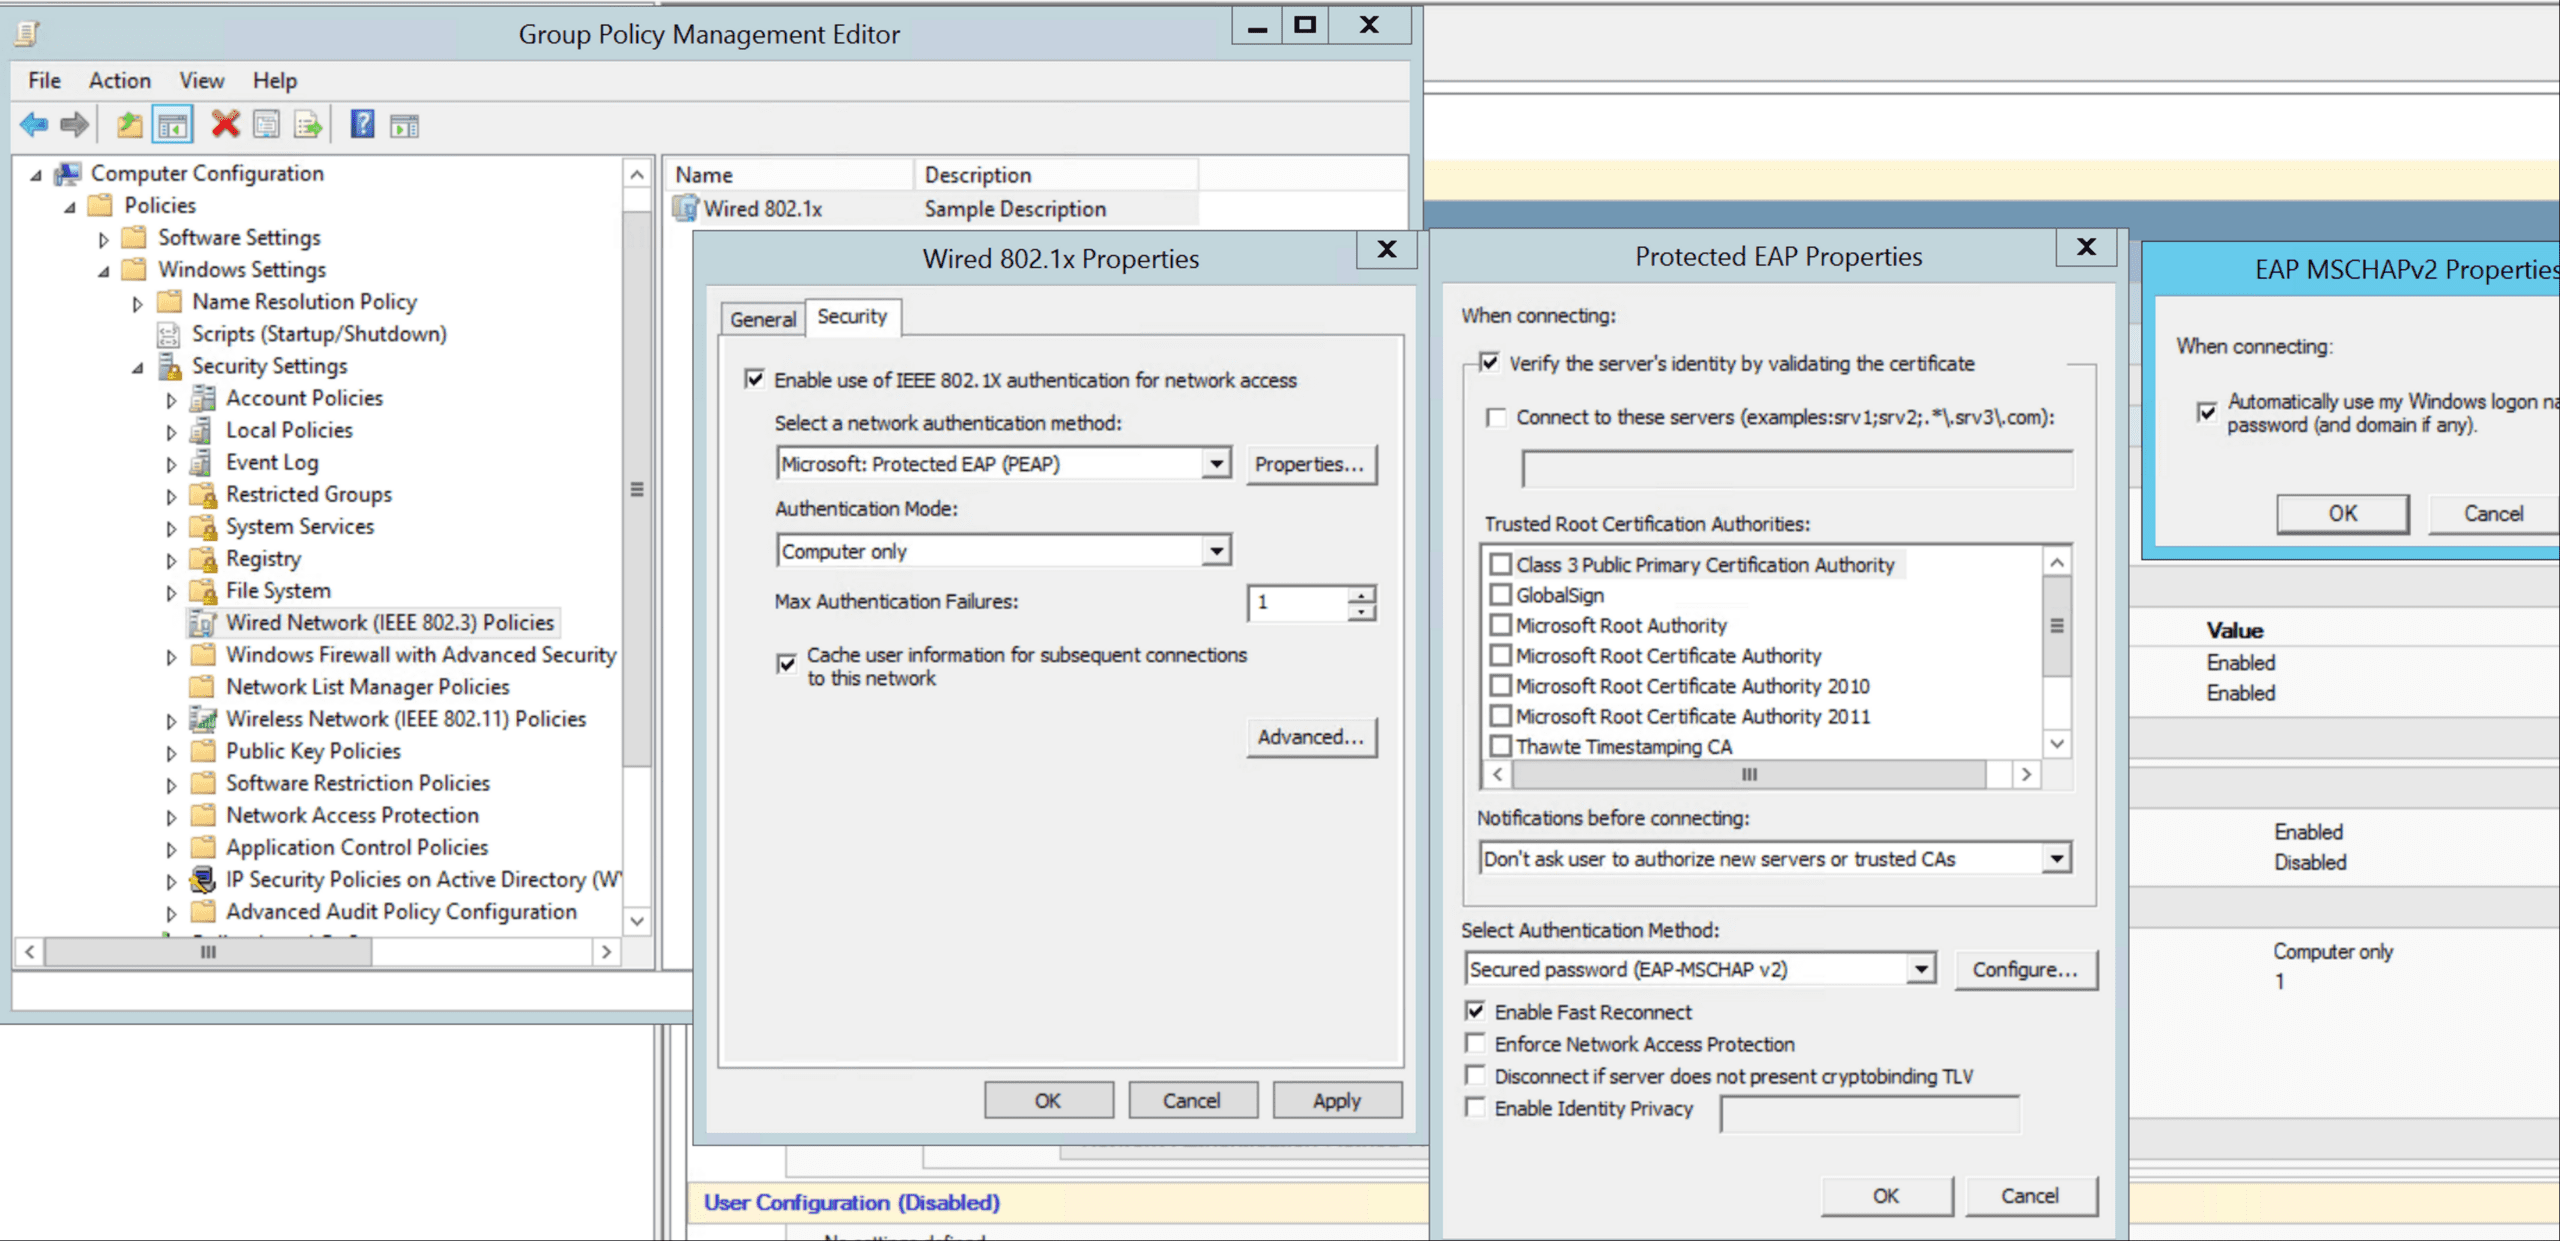
Next, we must configure the device with the Ethernet Profile defining the authentication parameters.
ICX Switch Configuration
Step 1 – Define the VLANs intended to be used for client data.
In order for a VLAN to be part of the authentication process, it needs to be active so ensure it is tagged on the uplinks first.
vlan 10 name MAC-Devices by port
tagged ethe 1/1/2
!
vlan 20 name 802.1x-Devices by port
tagged ethe 1/1/2
Step 2 – Define the VLANs to be used during the authentication
It is advised that these VLAN’s are not routable unless there is a requirement such as imaging machines
vlan 900 name auth-default-vlan by port >> If the switch receives no attributes the client will be placed into this VLAN
tagged ethe 1/1/2
!
vlan 901 name restricted-vlan by port >> If the RADIUS server denies access then the client is placed into this VLAN
tagged ethe 1/1/2
Step 3 – Define the authentication parameters
Authentication
auth-mode multiple-untagged
re-authentication
auth-default-vlan 900
restricted-vlan 901
max-sessions 3
auth-fail-action restricted-vlan >> Defines what action is taken should the client fail authentication
dot1x enable
dot1x enable ethe 1/1/17 to 1/1/32 >> Enables 802.1x on the specific ports
dot1x port-control auto ethe 1/1/17 to 1/1/32 >> Defines how the ports behave to allow for MACor 801.1x authentication
dot1x timeout tx-period 1
dot1x timeout quiet-period 1
dot1x timeout supplicant 1
mac-authentication enable
mac-authentication enable ethe 1/1/17 to 1/1/32 >> Enables mac authentication on the specific ports
mac-authentication password-override RuckusRocks! >> Overrides the password used in mac-auth from being the mac address to a complex password
Step 4 – Enable the switch to utilise 802.1x
aaa authentication dot1x default radius
Step 5 – Define the RADIUS server
radius-server host 192.168.30.238 auth-port 1812 acct-port 1813 default key secretkey dot1x mac-auth
If you have any questions on the above, please email them over to helpme@purdi.com who will be happy to reply with answers.
Please let us know if this article was useful by emailing sales@purdi.com. Please feel free to share this article with your colleagues but remember, if you’d like to benefit from more articles like this, you’ll need to be a trading customer and register as a partner, which you can do here.